One Button Controller
März 2025

Im Informatikunterricht haben wir damals gerne das Spiel “Achtung die Kurve! / Zatacka!” gespielt. Dabei bedient jeder Spieler zwei Tasten, um seine sich kontinuierlich fortbewegende Linie nach links oder rechts zu steuern und dabei allen immer länger werdenden Linien auszuweichen. Da das Spiel so einfach zu erklären ist und nur zwei Tasten benötigt wurde es oft sehr eng vor der Tastatur.
Bis heute spiele ich Achtung die Kurve! oder IPCurve noch sehr gerne mit Freunden. Neben diesem Klassiker gibt es aber mittlerweile viel mehr solcher Minispiele, die mit bis zu einem Button pro Spieler auskommen. Die sogenannten One Button Games. Mit mehreren Spielern vor einer Tastatur ist es aber nicht ganz als Couch Game tauglich. Jetzt gibt es zwar die Möglichkeit mehrere Gamepads zu verwenden, aber dann ist es schon wieder erheblich komplizierter zu erklären, welcher der 12 Knöpfe eine Funktion hat. Besser wäre es doch, wenn es nur einen Knopf zum Drücken gibt.
Mit dem Ziel mein erstes One Button Game auf der Makerfaire Ruhr 2025 zu präsentieren brauchte ich dazu passende, simple und robuste Controller.
Im Taster Sortimentskasten lag noch eine Tüte mit FUTABA MA41-JF Eingabetastern. Es fehlt also nur noch das Kabel und eine art Griff als Gehäuse.
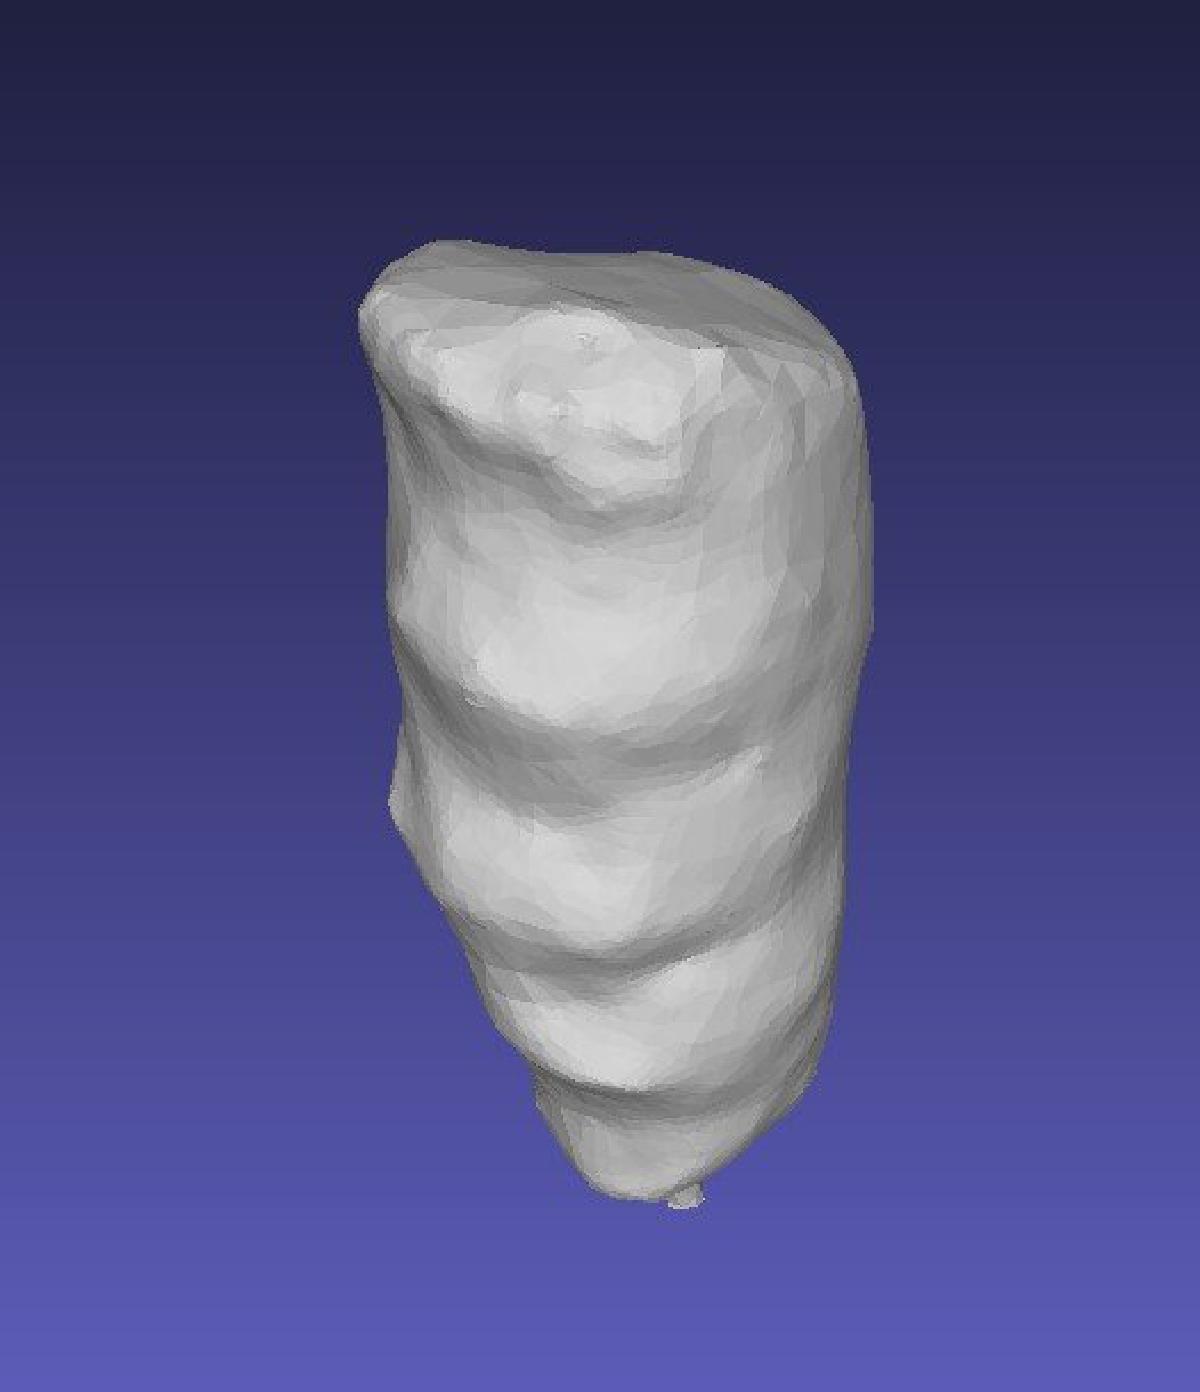
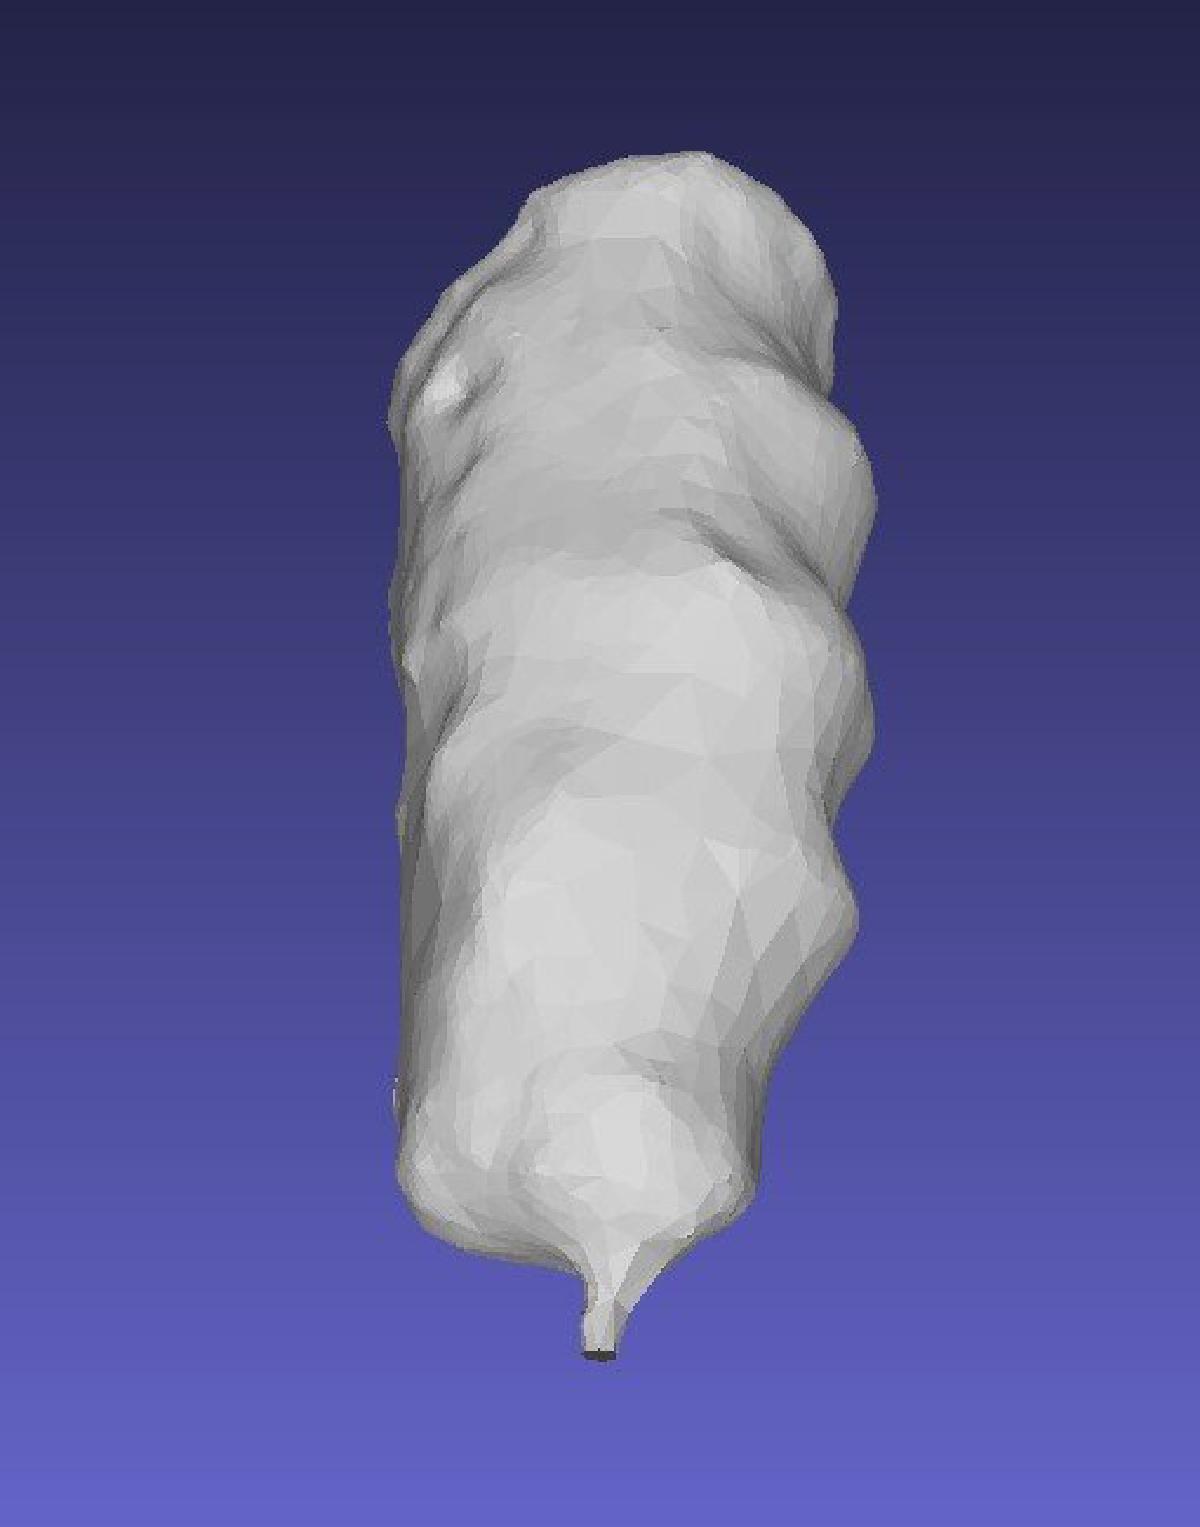
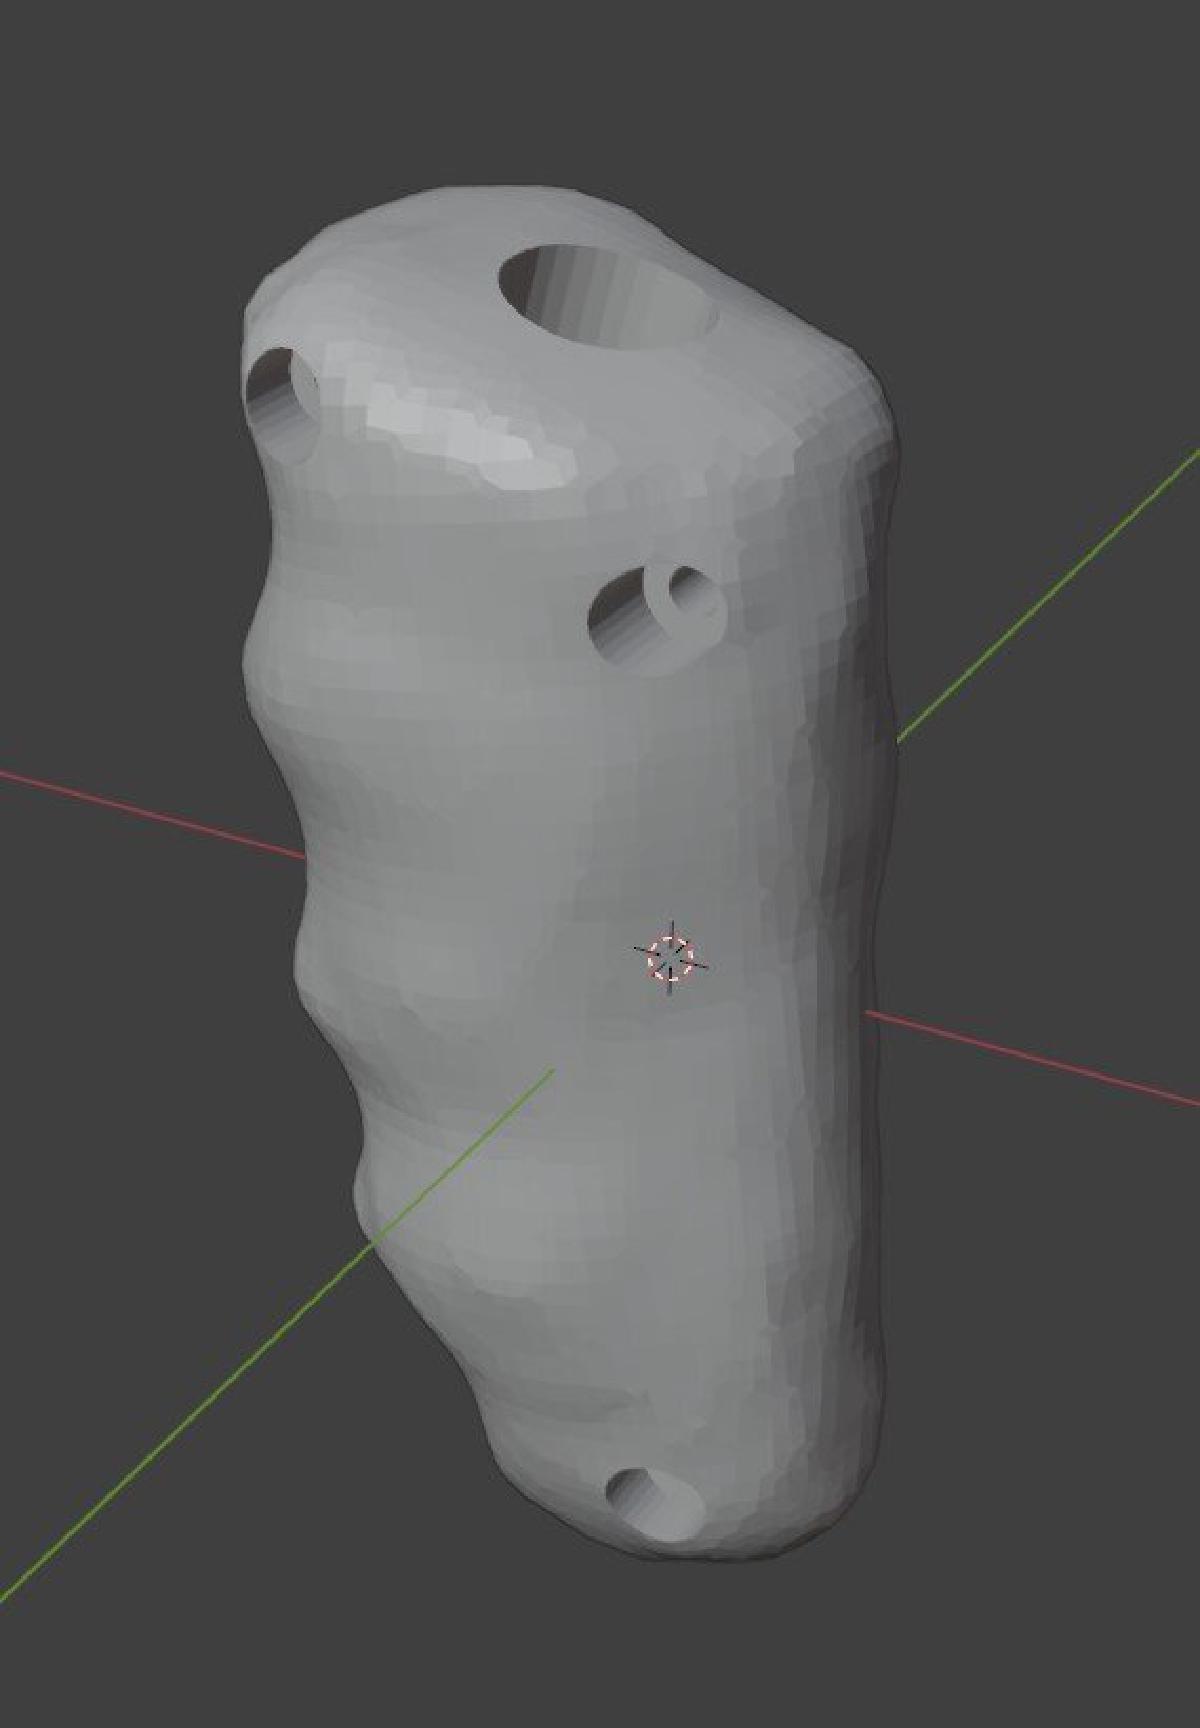
3D Druck eignete sich wieder hervorragend als Fertigungsmethode, da sich mit verschiedenfarbigen Filamenten die Spieler unterscheiden lassen. Jedoch konnte ich kein zufriedenstellendes 3D Modell finden (oder ich wollte es insgeheim nicht), weshalb ich mir ein Set Spielknete zugelegt habe, um daraus einen Griff zu formen. Diesen Griff haben wir mit der App Scaniverse auf einen IPhone mit Tiefenkamera eingescannt. Photogrammetrie mit der Software Meshroom habe ich auch ausprobiert, jedoch war das Mesh aus Scaniverse ein kleines bisschen besser geworden. Und der Scanprozess war deutlich einfacher. Dennoch würde ich zukünftig Photogrammetrie für solche Projekte verwenden und nach Möglichkeit zwei Farben Knete etwas vermischen, sodass die Strukturen besser zu erkennen sind.


Umliegende Geometrie kann in Scaniverse direkt entfernt werden. Das resultierende 3D Mesh ist hier in MeshLab geöffnet zu sehen. Dort habe ich auch die Geometrie etwas vereinfach und gefiltert.
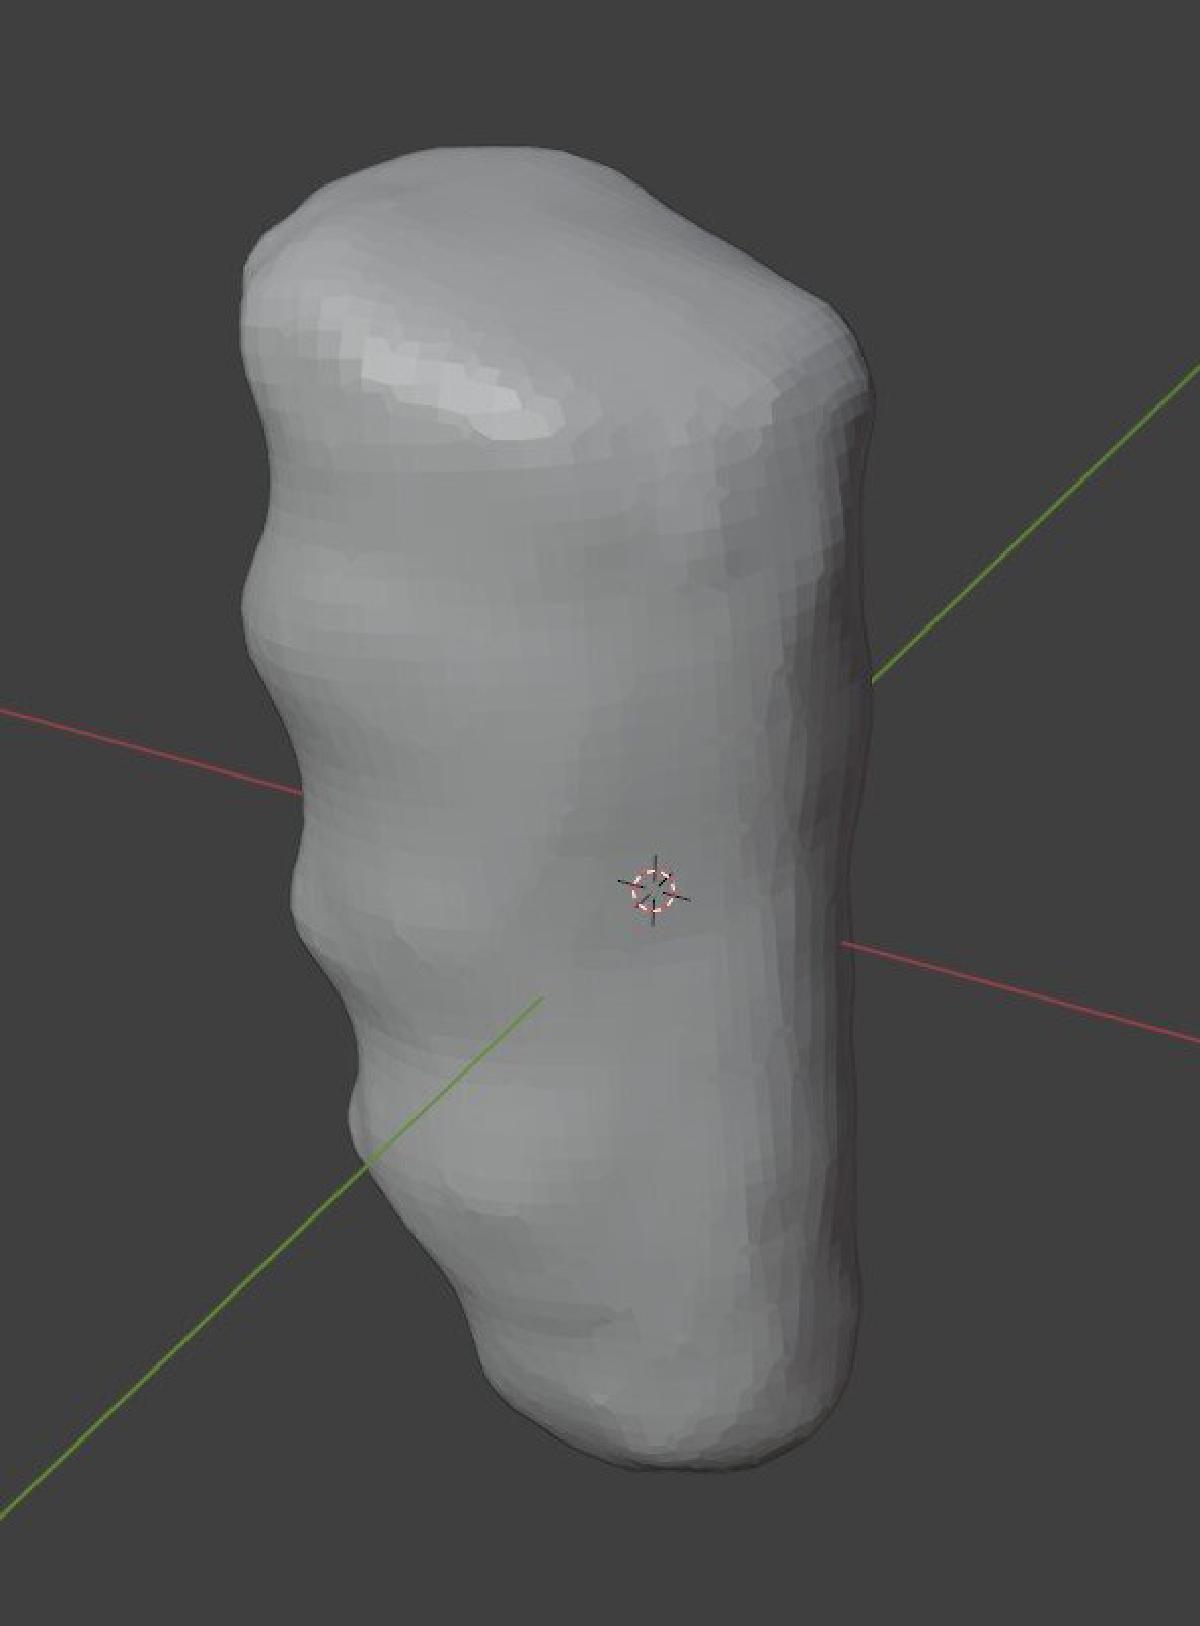
Weiter bearbeitet wurde die Grundform des Griffes in Blender. Zuerst wurde das Mesh gleichmäßig verteilt mittels Remesh Modifier. Anschließend bin ich mit dem Smooth Brush im Scrulpt Mode über alle spitzen Kanten gegangen, die nicht ganz sauber gescannt wurden.
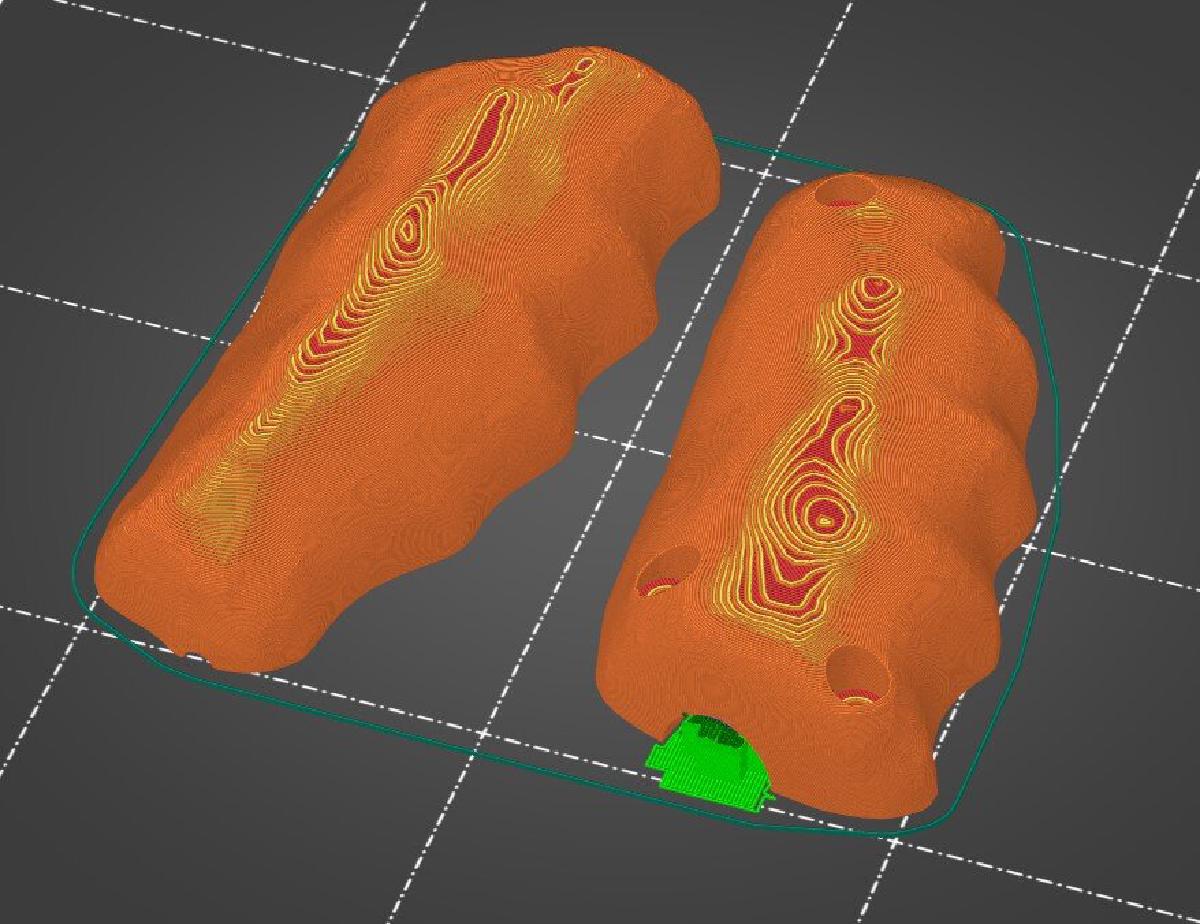
Als nächstes musste Platz für Taster und Kabel geschaffen werden. Dazu habe ich die zu entfernende Geometrie aus einzelnen Solids zusammengeschoben und danach mittels Boolscher Operation vom Grundmodell entfernt. Da ich das Modell in zwei Hälften drucken möchte kamen noch drei Löcher für M3x16 Schrauben hinzu.
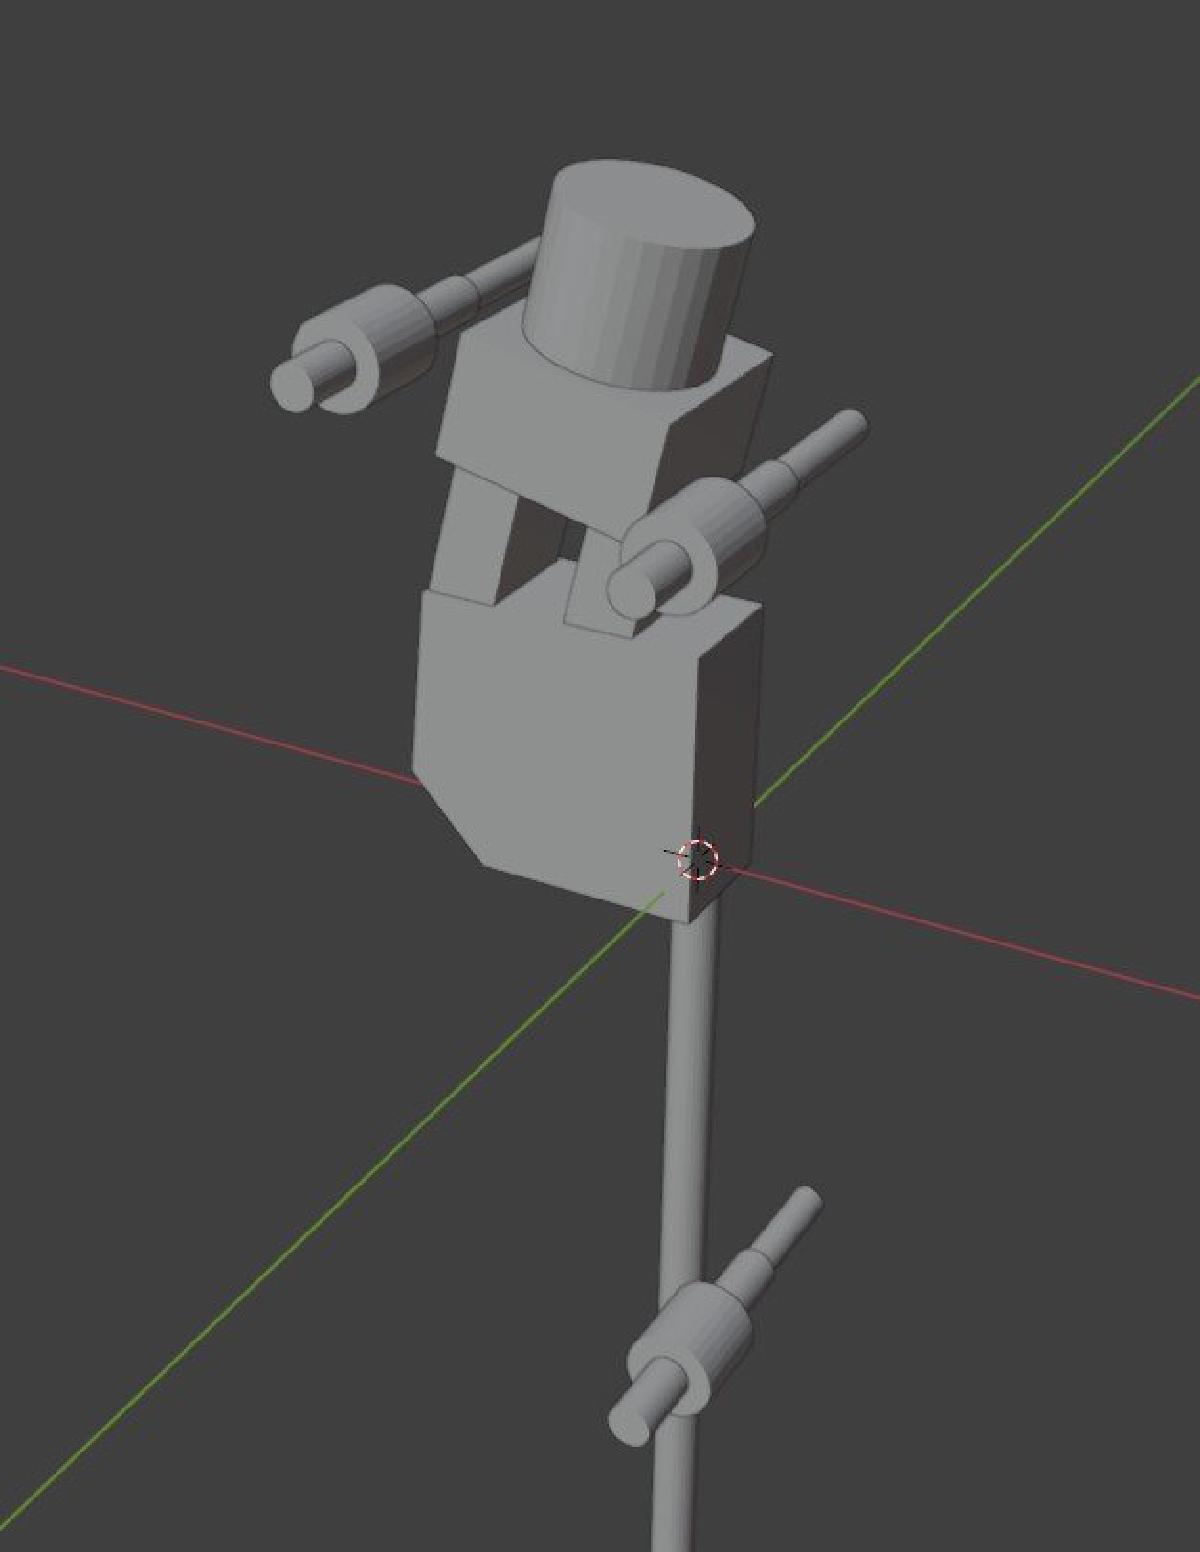
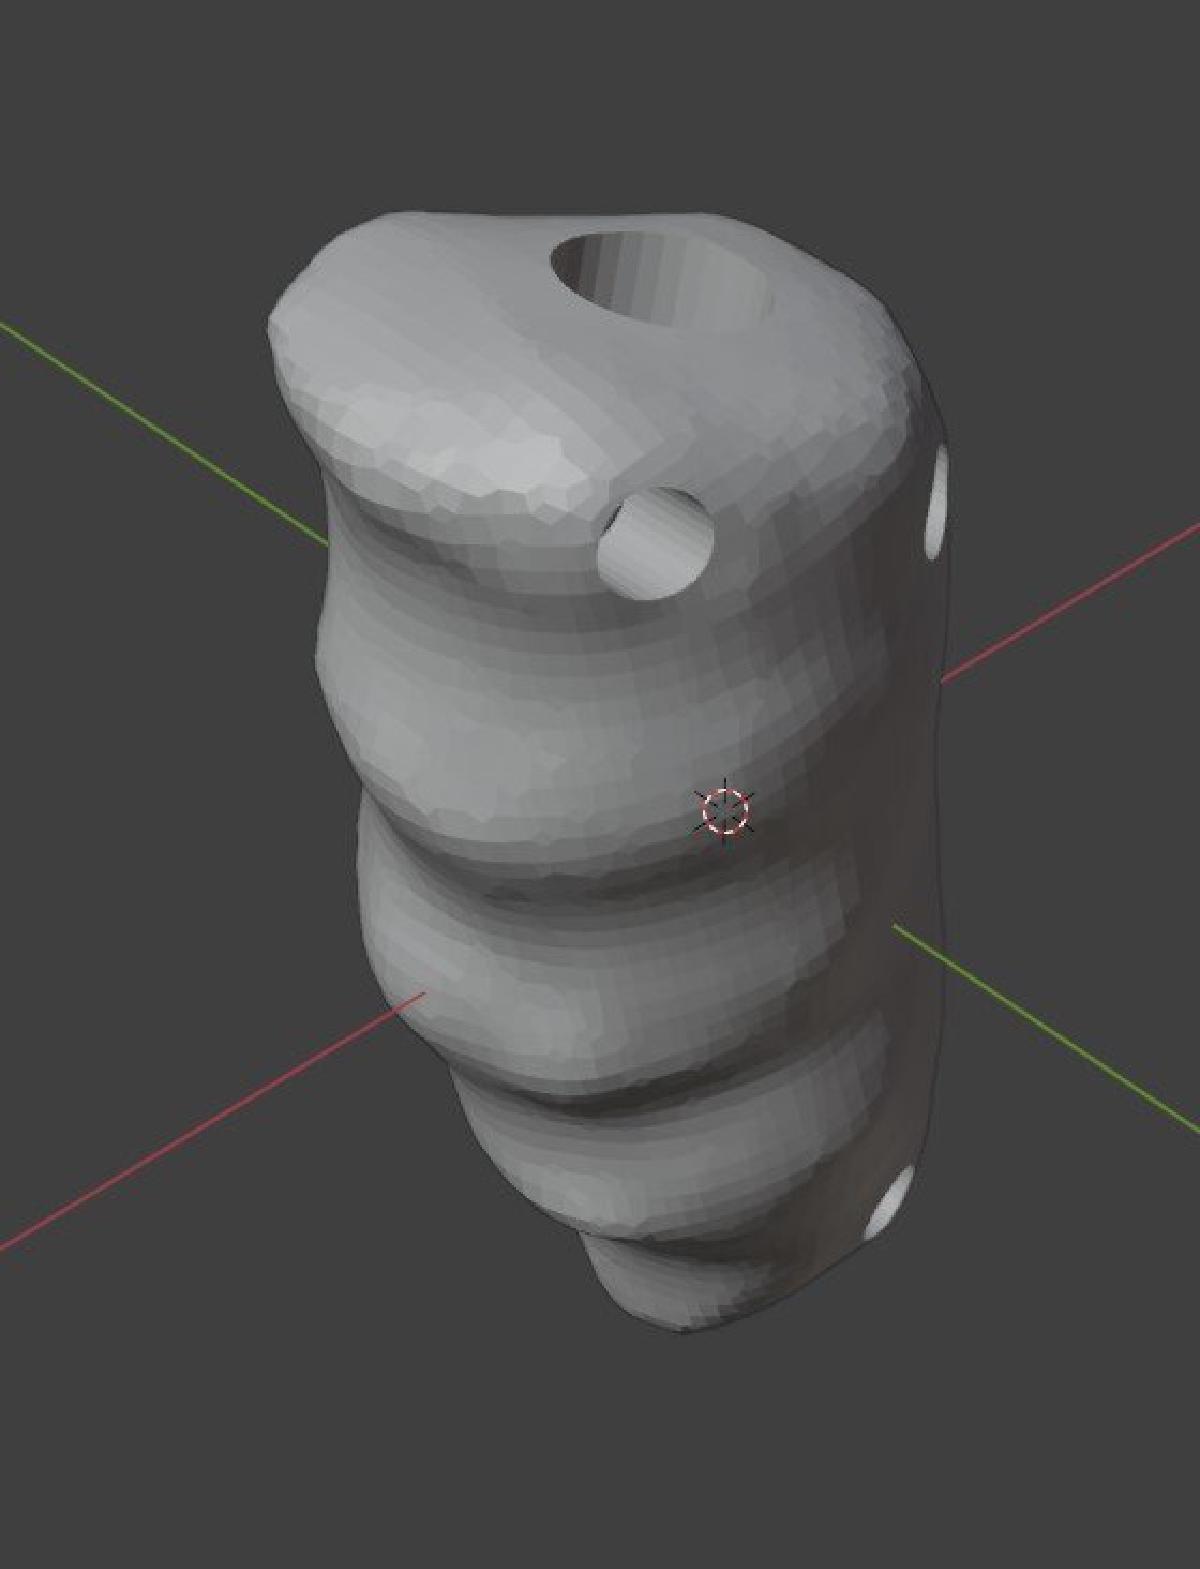
Durch Halbieren des Modells lassen sich Kabel und Taster nachher einfacher einbauen und der Druck an sich wird deutlich simpler.
Gedruckt wurde in den drei Grundfarben plus Lachs.
Innen rein wurde der Taster eingelegt, ein Kabel angelötet und beide Hälften zusammengeschraubt. Die Taster bekamen noch ein einfaches Keycap, was ebenfalls gedruckt ist.


Als Stecker verwende ich am Ende der 2,5m langen Kabel einen 6,35mm Mono Klinkenstecker.
Das Drücken eines dieser Taster wird von einem ESP32, der eine USB Tastatur Simuliert, an den Computer übertragen. Später soll dieser ESP noch Funkcontroller mit mehr als einer Taste unterstützen, weshalb das Gehäuse erstmal nur prototypisch umgesetzt wurde. (Not sponsored)


Und so fanden die Controller erfolgreich auf der Makerfaire Ruhr 2025 ihren Einsatz.
Bleibt nur die Frage: Wie mache ich besser kenntlich, dass darin kein Lagesensor verbaut ist und die Bobbycars in dem Spiel von alleine Lenken?


Rebuild Mai 2025
Für eine Austellung in der uzwei im Dortmunder U wurde ich angefragt mein One Button Rennspiel auszustellen. Das habe ich genutzt ein paar kleine Unzulänglichkeiten an der Hardware zu verbessern. Zum einen sind das die dünnen PVC Kabel, die sich leicht verhäddern und dann auch sehr schwer zu entknoten sind. Bei Thomann fand ich 6m Gitarrenkabel mit Textilmantel in vier verschiedenen Farben. Ein 6.35mm Klinkenstecker ist auch bereits dran.

Zum Anderen waren die Tasterköpfe nur lose aufgesteckt und wären bei rauem Ausstellungsbetrieb herausgefallen. Durch die dickeren Kabel mussten die Handgriffe noch angepasst und manche der zuvor gewählten Spielerfarben ausgetauscht werden.


Die Knöpfe sind in dieser Version jetzt im Griff vollständig eingefasst und können weder rausfallen, noch zu feste auf den Taster eingedrückt werden.


Weiterhin war eine Erkenntnis durch die Makerfaire, dass die raue unbearbeitete Oberfläche eines 3D Drucks in Kontakt mit vielen Händen sichtbaren Schmutz hinterlässt und schwer zu reinigen ist. Daher versuchte ich, die Kontaktflächen so glatt wie möglich zu bekommen. Durch Abschleifen mit zuerst groben, dann feinerem Schleifpapier und anschließendem Klarlackieren.

Controllerbox
Auch die Controllerbox zum Anschluss an einen Computer musste etwas solider werden. Basierend auf dem UltimateWaterproofCase_V6.1 habe ich in OpenSCAD befestigungen für einen ESP32-S3 Devkit M1 hinzugefügt. M3 Muttern wurden beim Drucken eingelassen.
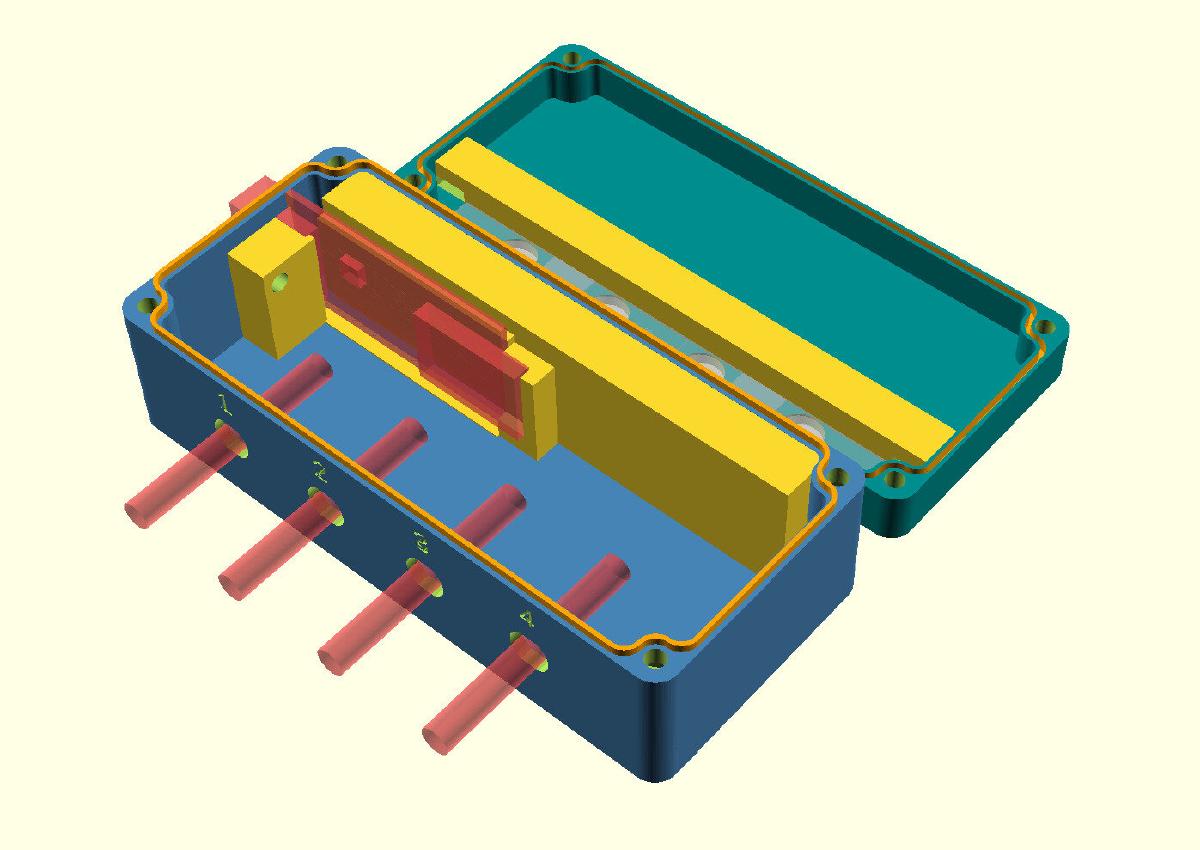

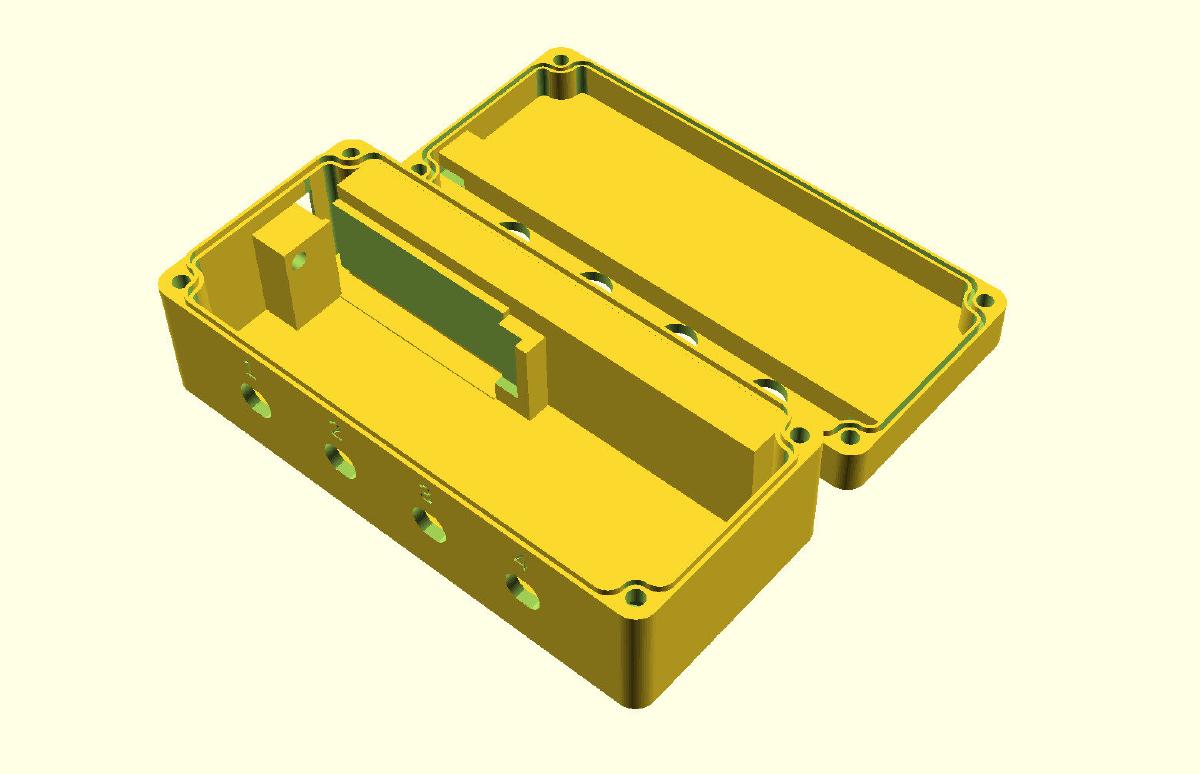
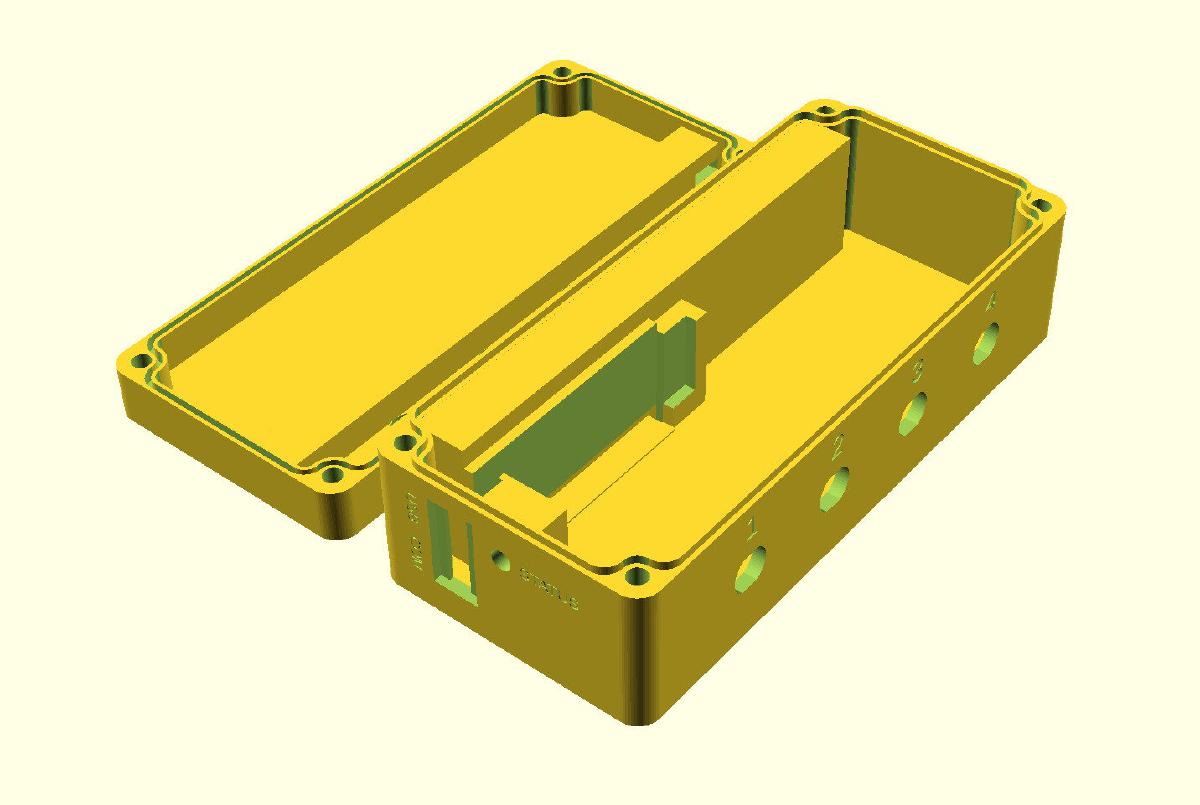
Ausgerichtet zu den 6.35mm Klinkenbuchsen befinden sich vier WS2812 LEDs, welche die Controllerfarbe anzeigen und signalisieren, wenn ein Button gedrückt ist. Das macht das Debuggen bei klemmenden Tasten einfacher. Die Status LED auf dem ESP Devboard ist durch eine Lightpipe seitlich herausgeführt.


Und hier sind sie an ihrem zu Anfang beschriebenen Bestimmungsort zu sehen: Ein One Button Spiel auf einem großen Bildschirm vor einer Couch.

